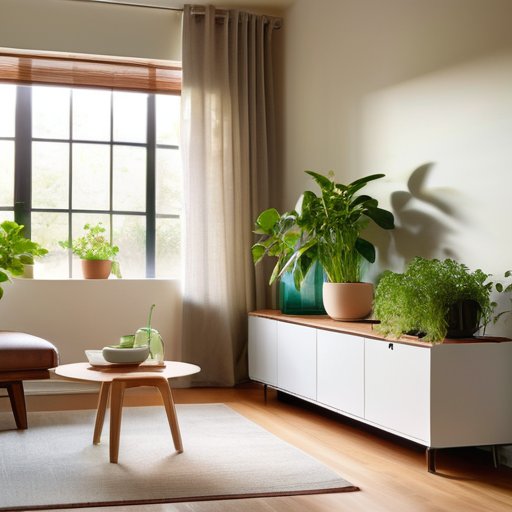
I still remember the day my partner and I decided to tackle our backyard, determined to learn how to build a raised garden bed. We were fueled by a mix of excitement and ignorance, but our mission was clear: transform our neglected outdoor space into a lush oasis. The common myth that you need a green thumb or a hefty budget to create a beautiful garden is just that – a myth. I’m living proof that with a little creativity and a lot of elbow grease, anyone can turn their chaos into a serene escape.
As we embarked on this journey, we encountered our fair share of trial and error. But through the process, we discovered that building a raised garden bed is not just about following a set of instructions – it’s about understanding your space, your needs, and your style. In this article, I’ll share our honest, no-hype experience on how to build a raised garden bed, from choosing the right materials to adding those personal touches that make it truly yours. We’ll dive into the practical advice and lessons we learned along the way, so you can avoid the mistakes we made and create your own little slice of heaven.
Table of Contents
Guide Overview: What You'll Need

Total Time: 2 hours 30 minutes
Estimated Cost: $50 – $100
Difficulty Level: Intermediate
Tools Required
- Tape Measure for measuring lumber
- Circular Saw for cutting 2-in x 6-in lumber
- Drill for drilling screw holes
- Hammer for tapping screws into place
- Level for ensuring the bed is level
- Gloves for protecting hands while handling lumber and soil
Supplies & Materials
- 2-in x 6-in lumber for the frame of the garden bed, 8 feet long
- 2-in x 4-in lumber for the bottom of the garden bed, 8 feet long
- Wood Screws 2.5 inches long, for assembling the frame
- Weather-Resistant Wood Glue for reinforcing the frame
- Soil for filling the garden bed
- Gravel or Landscape Fabric for drainage and weed control
Step-by-Step Instructions
- 1. First, let’s get our materials ready. We’ll need some wooden planks, screws, a drill, and a saw. I like to think of this step as the ” treasure hunt” part of our DIY adventure, where we scour flea markets or home improvement stores for the perfect pieces. My partner and I found these amazing reclaimed wood planks at a local market, and we just knew they’d be perfect for our raised garden bed.
- 2. Next, we need to measure and mark our wooden planks to the right size. This is where things can get a bit tricky, but don’t worry, it’s all part of the fun. We’re aiming for a bed that’s about 6-8 feet long and 3-4 feet wide, but feel free to get creative and adjust the size to fit your space. Just remember to double-check your measurements before you start cutting.
- 3. Now it’s time to cut our wooden planks to size. This is the part where we get to break out the power tools and feel like total bosses. My partner is a bit of a drill enthusiast, and I have to admit, it’s pretty satisfying to see our planks transform into the perfect pieces for our garden bed. Just be sure to wear your safety goggles and keep those fingers away from the blade.
- 4. With our planks cut and ready, it’s time to assemble our frame. We’ll use screws to attach the sides and bottom of our bed, making sure it’s sturdy and secure. This is where things start to take shape, and you’ll get a glimpse of your beautiful raised garden bed coming to life. Don’t worry if it’s not perfect – we’re going for charmingly imperfect here.
- 5. Next up, we need to add a bottom layer to our garden bed. We’ll use a mixture of soil, compost, and perlite to create a rich and fertile base for our plants to grow. This is where the magic happens, and your garden bed starts to feel like a real oasis. Just be sure to mix it up well and get your hands dirty – it’s all part of the fun.
- 6. Now it’s time to add the sides to our garden bed. We’ll use the same wooden planks to create a sturdy border, making sure to attach them securely with screws. This is where our raised garden bed starts to look like a real showstopper, and you’ll be eager to get planting.
- 7. Finally, let’s add some finishing touches to our garden bed. We’ll add a layer of soil on top, plant our favorite herbs and veggies, and voila! Our raised garden bed is complete. This is the part where we get to stand back and admire our handiwork, feeling proud of what we’ve accomplished. And trust me, there’s no better feeling than biting into a fresh, homegrown tomato, knowing you built the bed it grew in with your own two hands.
Build Your Oasis

As I stepped back to admire our latest DIY masterpiece, I realized that creating a thriving oasis isn’t just about following a set of instructions – it’s about embracing the process and having fun with it. My partner and I have learned that raised garden bed designs for small spaces can be just as beautiful and functional as their larger counterparts. We opted for a compact design that fits perfectly in our tiny backyard, and it’s been a game-changer for our urban gardening adventures.
When it comes to choosing the right materials, I’m a big fan of garden bed frame materials comparison. We went with reclaimed wood for our frame, which not only added a touch of rustic charm but also helped reduce waste. Plus, it’s incredibly durable and can withstand the elements. As for the soil, we experimented with different garden bed soil mixture recipes until we found the perfect blend for our plants.
Now that our raised garden bed is up and running, we’re excited to explore raised garden bed irrigation systems that will make maintenance a breeze. We’re considering a drip irrigation system that will deliver water directly to the roots of our plants, reducing evaporation and runoff. It’s all about finding that perfect balance between form and function, and we can’t wait to see our little oasis flourish.
Garden Bed Frame Materials Comparison
When it comes to framing our little oasis, the materials we choose can make all the difference. I’ve experimented with wooden planks, and let me tell you, they add a beautiful rustic touch. However, they do require some maintenance to prevent rotting. On the other hand, metal frames are sleek and low-maintenance, but can be pricey. My partner and I have also tried using recycled plastic frames, which are not only eco-friendly but also super durable.
We’ve found that each material has its pros and cons, and it really depends on your personal style and budget. Wooden planks give our garden a cozy feel, while metal frames provide a more modern look. Recycled plastic frames, meanwhile, offer a unique blend of sustainability and practicality. By considering these factors, you can choose the perfect frame to complement your raised garden bed and turn your outdoor space into a thriving oasis.
Raised Garden Bed Designs for Small Spaces
Now that we’ve got the basics covered, let’s talk about making the most of those tiny spaces. I’m obsessed with squeezing in a mini garden wherever I can – think balconies, fire escapes, or even just a skinny side yard. For small spaces, I swear by narrow, tall raised beds or those nifty tiered planters. They’re perfect for adding some greenery to tight spots, and they look adorable to boot. Plus, you can customize them to fit your unique space and style. My partner and I even repurposed an old wooden ladder into a quirky planter – it’s now the star of our tiny backyard.
Digging Deeper: 5 Tips to Raise Your Garden Bed Game
- Measure Twice, Dig Once: Double-check your garden bed’s dimensions to ensure it fits perfectly in your chosen spot, saving you from costly mistakes and wonky layouts
- Choose Your Weapon: Select the right tool for the job – a good shovel, a sturdy level, and a trusty tape measure will become your new BFFs in the gardening world
- Drainage is Key: Don’t forget to add a layer of gravel or broken pottery to the bottom of your raised bed, allowing excess water to escape and preventing waterlogged soil
- Get Creative with Materials: Think beyond traditional wood – consider using recycled plastic, metal, or even old brick to add a unique touch to your garden bed and reduce waste
- Add a Personal Touch: Incorporate decorative elements, like a trellis or a sundial, to make your raised garden bed a true reflection of your personality and style, and a beautiful addition to your outdoor space
Key Takeaways for a Thriving Raised Garden Bed
Remember, the size and material of your raised garden bed are entirely up to you and what works best for your space – don’t be afraid to think outside the box (or garden bed)!
Mixing and matching different materials for your garden bed frame can add a unique touch to your outdoor oasis, and shopping second-hand can be a game-changer for your budget
With a little creativity, some elbow grease, and the right tools, you can turn even the smallest, most neglected space into a lush haven that brings you joy and fresh produce all season long
Sowing Seeds of Wisdom
Building a raised garden bed isn’t just about planting flowers or veggies, it’s about cultivating a sense of pride and peace in your own little slice of chaos – and the best part? You can do it with nothing more than some reclaimed wood, a few screws, and a whole lot of heart!
Maya Rivera
You Did It: Now Go Forth and Garden

As we wrap up this DIY journey, let’s recap the key takeaways: we’ve learned how to build a raised garden bed from scratch, explored various designs for small spaces, and compared different materials for the frame. It’s been a wild ride, but I hope you’ve had as much fun as I have, getting your hands dirty and watching your outdoor space transform into a lush oasis. Remember, the most important aspect of this project isn’t the end result, but the process itself – the learning, the experimenting, and the creative problem-solving that comes with it.
So, as you stand back to admire your handiwork, don’t be afraid to think outside the box and imagine all the possibilities your new raised garden bed holds. Whether you’re a seasoned green thumb or a beginner, this is just the beginning of your gardening journey. With every seed you plant and every harvest you reap, you’ll be reminded that with a little creativity and elbow grease, you can turn even the most neglected space into a thriving, vibrant haven that brings you joy and peace. Happy gardening, friends!
Frequently Asked Questions
What are some creative ways to repurpose old materials for a raised garden bed?
I’m all about upcycling, so let’s get creative! Old pallets, bricks, and even bathroom tiles can become amazing raised garden beds. I once used an old wooden door as a frame – it was a total game-changer! Think outside the box (or garden bed, haha) and scour those flea markets or your grandma’s attic for hidden gems.
How do I ensure proper drainage in my raised garden bed to prevent waterlogged soil?
Don’t worry, I’ve been there – waterlogged soil is the worst! To ensure proper drainage, add a layer of gravel or broken pottery at the bottom of your raised bed, and make sure the bed is at least 6-8 inches high to allow excess water to escape. Trust me, it’s a total game-changer!
Can I build a raised garden bed on a slope or uneven ground, and if so, what special considerations do I need to take?
Slopes and uneven ground, no problem. We tackled that in our own backyard. Just ensure your frame is level, and consider adding extra support or a retaining wall if needed. It’s all about getting creative with those uneven spots – and trust me, a can of paint can even hide any wonky bits later on.