I was perched on a wind‑battered terrace in a remote Andean village, the sun already painting the stone walls gold, when the village council asked, “Can we power the clinic without waiting for the national grid?” The typical answer you hear on forums—“DIY solar is a nightmare of permits and engineering degrees”—was the exact myth I was about to debunk. In the next few hours I sketched a DIY solar power station guide on a battered notebook, proving that with the right mindset, a modest budget, and a pinch of curiosity, a functional micro‑grid can rise from a single rooftop. No PhD required, just a willingness to get your hands dirty.
From that sunrise moment to the final checklist, this article walks you through every step I used on the ground: assessing solar potential, sourcing affordable panels, navigating local permitting (yes, the paperwork can be a breeze if you know the right questions), wiring safely, and fine‑tuning the system for a community of thirty. Expect no‑hype buzzwords, just clear, field‑tested instructions, cost breakdowns, and a handful of anecdotes that remind you why renewable energy feels like a shared adventure.
Table of Contents
- Step-by-Step Instructions
- Sizing Your Offgrid Solar Battery Bank for Community Resilience
- Choosing a Solar Charge Controller With Safety in Mind
- Five Practical Nuggets for Building Your Own Solar Power Hub
- Key Takeaways for Your DIY Solar Power Journey
- Solar DIY: A Global Gift
- Wrapping It All Up
- Frequently Asked Questions
Guide Overview
Tools & Supplies
- Drill – for mounting brackets and creating conduit holes
- Screwdriver set – to secure hardware and wiring connections
- Wire stripper/cutter – to prepare electrical conductors
- Multimeter – for checking voltage, current, and continuity
- Solar panels (monocrystalline, 100 W each) – 2‑4 units
- Charge controller (MPPT, 20‑30 A) – 1 unit
- Deep‑cycle battery (AGM or Li‑Fe, 12 V, 100 Ah) – 1 unit
- Power inverter (pure sine wave, 500 W) – 1 unit
- PV mounting brackets and rails – as needed for panel size
- MC4 connectors and waterproof junction box – 1‑2 kits
- Solar cable (10‑AWG, UV‑rated) – ~20 ft
- Battery cables (4‑6 mm²) – 2‑3 m
- Fuses and circuit breakers – appropriate ratings for system
- Fuse block or distribution panel – 1 unit
- Grounding rod and grounding wire – 1 set
- Weather‑proof enclosure for controller and inverter – 1 unit
Step-by-Step Instructions
- 1. First, I map out my energy appetite. I sit at my kitchen table with a notebook, tallying the watt‑hours my lights, laptop, and occasional fridge will demand over a typical day. Then I walk the spot where I plan to set up the station—whether it’s a sunny rooftop in a remote village or a freestanding frame in my garden—and I sketch the sun’s path, noting any shade from trees or nearby structures. This simple audit tells me the size of the array I’ll need and ensures I’m not over‑building a system that will sit idle under a cloudless sky.
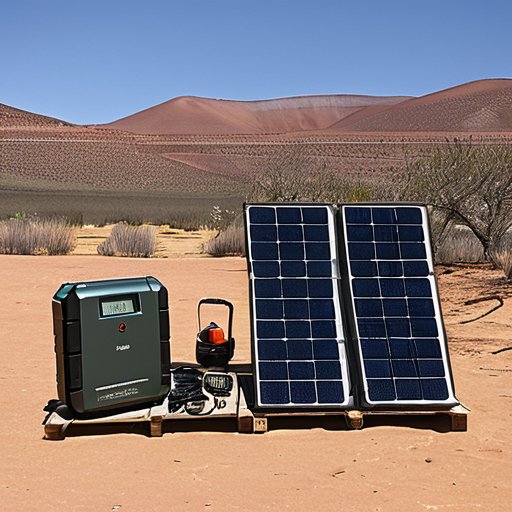
- 2. Next, I gather the heart of the station: the components. I order monocrystalline panels for their high efficiency, a MPPT charge controller to coax every photon into usable power, a deep‑cycle battery bank for nighttime resilience, and a pure‑sine‑wave inverter to feed clean electricity into my home. I also pick up appropriate fuses, MC4 connectors, and a sturdy mounting kit. While browsing, I chat with a local solar supplier, learning about the importance of temperature‑rated cables for my humid climate—a reminder that every detail, even the colour of the wiring, can affect performance.
- 3. Then, I design the layout and secure the mounting. Using a tape measure and a level, I mark the exact positions where each panel will sit, spacing them to avoid mutual shading at the solstices. I drill pilot holes into the mounting rails, fastening them with stainless‑steel bolts that will resist rust on my coastal property. Once the rails are anchored, I gently tilt the panels at an angle that matches my latitude—usually around 30° for my location—so they can capture the sun’s bounty from sunrise to sunset.
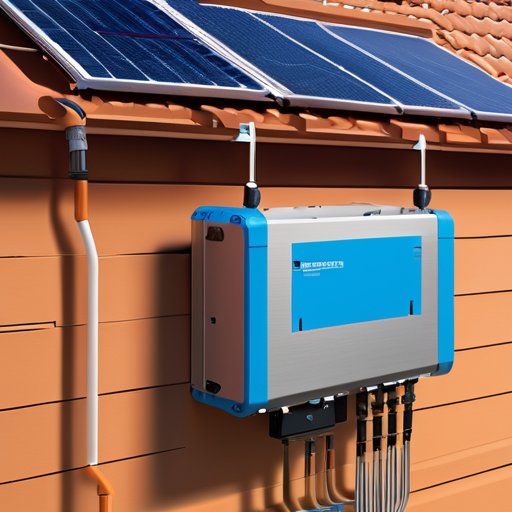
- 4. Now comes the wiring choreography. I connect the panels in series to achieve the desired voltage, threading the DC cables through conduit to protect them from the elements. At the charge controller, I attach the positive and negative leads to the battery bank, double‑checking polarity with a multimeter. I then link the inverter to the battery terminals, ensuring the grounding rod is driven deep into the earth for safety. Throughout, I label each wire with weather‑proof tags, turning a technical task into a personal catalog of my solar story.
- 5. After the hardware is in place, I power up and test. I flip the main breaker, watch the charge controller’s display light up, and listen for the gentle hum of the inverter as it converts DC to AC. I run a simple load test by plugging in a lamp and a phone charger, confirming that the voltage remains steady. I also log the system’s initial charge rate in my notebook, noting any fluctuations that might hint at wiring resistance or shading issues I missed earlier.
- 6. Finally, I establish a maintenance routine. I schedule a monthly visual inspection of the panels, wiping away dust and bird droppings that could dim their efficiency. I also set a calendar reminder to balance the battery bank every three months, ensuring each cell stays healthy. By documenting these chores in a shared Google Sheet, I create a transparent record that my neighbors can reference when they set up their own stations—turning a solitary project into a community knowledge hub.
Sizing Your Offgrid Solar Battery Bank for Community Resilience
In any off‑grid adventure, the first question I ask myself is: how many kilowatt‑hours will my neighbours and I actually consume when the grid goes dark? That answer drives the off‑grid solar battery bank sizing exercise. I start by tallying my essential loads—LED lighting, a small fridge, a community radio—and then apply a 50 % depth‑of‑discharge rule to protect lead‑acid or lithium modules. From there, I choose a solar charge controller that can handle at least 125 % of my expected charge current, because a well‑matched controller is the quiet guardian of both batteries and people. And never forget the solar power system safety tips: proper fusing and ventilation are non‑negotiable.
Once the bank is sized, I stress‑test it with a portable solar generator for camping before the village leans on it. That trial shows whether my wiring plan matches the solar panel wiring diagram I drafted and highlights any bottlenecks before I move to the DIY solar inverter setup. If the inverter can handle a 2 kW surge, the community can power a water pump or an internet hub during outages. Remember, scaling up is easier than retrofitting an undersized bank.
Choosing a Solar Charge Controller With Safety in Mind

When it comes to solar charge controller selection, safety starts with understanding the technology that sits between your panels and the battery bank. An MPPT (Maximum Power Point Tracking) controller not only squeezes out 20‑30 % more energy than a PWM (Pulse‑Width Modulation) unit, it also includes built‑in voltage‑sensing that guards against over‑charging—a silent threat to long‑term battery health. Look for models that list a temperature‑compensated charge algorithm and a short‑circuit protection rating that exceeds the maximum current your off‑grid solar battery bank sizing plan will demand. A good rule of thumb is to choose a controller rated for at least 125 % of your array’s peak current; that little buffer becomes a lifesaver when a sudden cloud burst spikes your panel output.
Beyond the controller itself, the wiring layout can make or break your solar power system safety tips. A clear solar panel wiring diagram that shows fused connections, proper gauge, and a dedicated grounding strap will keep a portable solar generator for camping from turning into an accidental fire hazard. If you’re pairing the controller with a DIY solar inverter setup, be sure to route the DC side through a fuse or circuit breaker rated slightly lower than the inverter’s input rating—this creates a “fail‑safe” zone should a surge appear. Finally, many modern controllers offer Bluetooth or Wi‑Fi telemetry; using that feature to monitor voltage, temperature, and state‑of‑charge lets you spot anomalies before they become emergencies, turning a weekend project into a reliable, community‑focused power hub.
Five Practical Nuggets for Building Your Own Solar Power Hub
- Start with a clear energy audit—list every device you’ll run, estimate daily watt‑hours, and let those numbers shape your panel and battery choices.
- Choose modular components (panels, charge controller, inverter) that can be added later, so your system grows with your needs and budget.
- Wire safety isn’t optional: install appropriately rated fuses, a main disconnect, and follow local electrical codes to keep sparks at bay.
- Keep a tidy wiring diagram and label each conduit; future you (or a neighbor) will thank you when troubleshooting.
- Design with community resilience in mind—plan for extra storage or a shared charging point so neighbors can tap into your station during outages.
Key Takeaways for Your DIY Solar Power Journey
Size your battery bank to cover nightly demand and anticipate future community expansion.
Select a charge controller with built‑in safety nets—MPPT efficiency, over‑voltage, short‑circuit, and temperature protection.
Design the system modularly so you can add panels or storage later and easily share power with neighbours.
Solar DIY: A Global Gift
“When I wired my first off‑grid panel, I realized each photon was a passport—inviting us to build not just a power station, but a shared future where energy, like stories, travels across borders.”
Alexandra Thompson
Wrapping It All Up
In this guide we walked through the practical steps that turn a patch of roof or a sunny field into a reliable, off‑grid power hub. We began by assessing site orientation, then sized the photovoltaic array to match our daily load, and finally calculated a solar battery bank that can weather a cloudy weekend without leaving anyone in the dark. The heart of the system—choosing a robust charge controller—was given special attention, because safety isn’t an afterthought but a prerequisite for long‑term resilience. From wiring the panels to grounding the inverter, from commissioning the system to drafting a simple maintenance schedule, each chapter was designed to demystify the process and give you the confidence to power your own community.
As a former diplomat turned citizen‑engineer, I’ve seen how reliable energy can become a bridge between neighbors, schools, and small businesses, especially in remote corners of the world where the grid still feels like a distant promise. Building your own solar station isn’t just a DIY project; it’s a statement that we can all contribute to a renewable future—one that respects the planet and empowers local voices. So, take that first step, share your progress with the neighborhood, and let the sun become the common language that lights up our shared tomorrow.
Frequently Asked Questions
How do I properly size the inverter for my off‑grid solar power station to ensure reliable performance without overspending?
From my own builds, list every appliance you plan to run simultaneously and add their wattages; that gives your peak‑load demand. Multiply that figure by 1.2‑1.5 to cover start‑up surges—especially for motors or refrigerators. Choose an inverter whose continuous rating meets or exceeds this adjusted number, with ≥ 90 % efficiency and a pure‑sine wave if you have sensitive electronics. Leave a modest safety margin for future loads, but avoid over‑specifying and inflating costs.
What routine maintenance steps should I follow to keep my solar panels, battery bank, and charge controller operating efficiently over the years?
First, I make a habit of rinsing my panels with water and a sponge every few weeks, checking for dust or bird droppings that could dim their output. Once a quarter I inspect mounting bolts and tighten any loose ones. The battery bank gets a check: clean terminals, verify electrolyte levels (if lead‑acid), and run a capacity test. I log the controller’s voltage settings, clean its fan vents, and update firmware annually. These rituals keep the system humming.
Are there any local regulations or permits I need to secure before installing a DIY solar power system, and how can I navigate those requirements?
I’ve learned that every municipality has its own “solar checklist,” so the first step is to visit your city or county planning department’s website—or better yet, swing by in person and ask for the latest permitting guide. Look for terms like “photovoltaic‑system permit,” “interconnection agreement,” and any zoning setbacks that might affect panel placement. If the paperwork feels daunting, consider reaching out to a local installer; many are happy to walk you through the forms, fee schedules, and inspection timelines, turning bureaucracy into a quick, community‑building conversation.