
Ever stared at a scuffed, whisper‑thin plank and wondered whether you need a professional crew to bring it back to life? I used to think the only answer was a costly sand‑and‑seal job, until a rainy afternoon in a centuries‑old cottage outside Inverness showed me the opposite. While waiting for tea to steep, I ran my fingertips over the faded grain and realized that restoring old hardwood floors tips aren’t about erasing history, but coaxing it back into focus. In that moment I vowed to demystify the process for anyone who’s ever felt stuck.
What you’ll find in the next pages is a no‑hype, step‑by‑step walk‑through that starts with a safety checklist, moves through choosing the right grit, mastering the art of wet‑sand versus dry‑sand, and ends with a finish that respects the floor’s original character. I’ll share the exact tools I packed on an assignment in Kyoto, explain how to budget for a sealant without breaking the bank, and flag three common pitfalls that turn a promising restoration into a costly setback. By the end, you’ll have a roadmap to revive your wood’s story—no jargon, honest guidance.
Table of Contents
- Step-by-Step Instructions
- How to Refinish Hardwood Floors Repair Scratches and Stain Like a Pro
- Choosing the Best Sandpaper Grit Renting Equipment for Global Results
- Five Proven Tips to Breathe New Life into Weathered Hardwood
- Essentials to Remember
- Echoes Beneath the Grain
- Wrapping It All Up
- Frequently Asked Questions
Guide Overview
Tools & Supplies
- Floor sander (belt or orbital) – removes old finish and evens the surface
- Edge sander (or hand‑held sander) – reaches corners and perimeter edges
- Shop vacuum with HEPA filter – cleans dust between sanding passes
- Safety goggles and dust mask – protect eyes and lungs from fine particles
- 60‑grit sandpaper (20 sheets) – initial rough sanding
- 120‑grit sandpaper (20 sheets) – medium sanding for smoother surface
- 220‑grit sandpaper (20 sheets) – final prep before finishing
- Wood filler (1 tube) – fills nail holes and minor gouges
- Polyurethane finish (1 gal) – protects and adds sheen to the floor
- Tack cloth (1 roll) – removes fine dust before applying finish
Step-by-Step Instructions
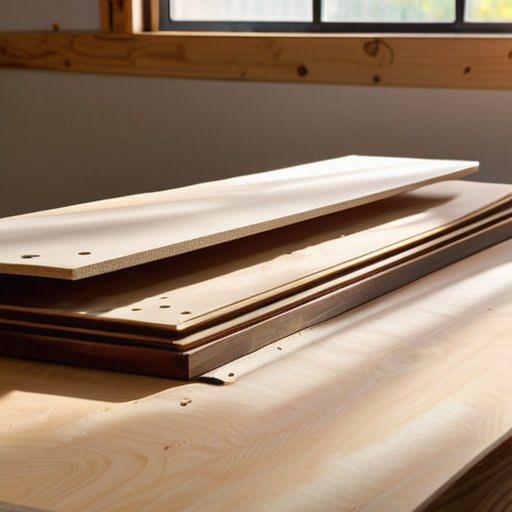
- 1. Start with a respectful survey of the floor’s history. I always begin by walking the room barefoot, feeling the subtle creaks that echo stories from past occupants. Take a notebook and sketch the pattern of wear, noting any stains or scratches that might hint at previous renovations. This quiet inventory helps me decide whether a light sanding will suffice or if a deeper revival is needed.
- 2. Clear the space and protect the surrounding walls. Before the first dust settles, I move furniture to the center of the room, covering it with breathable canvas sheets—something I learned while staying in a Kyoto ryokan, where minimalism respects the floor itself. Lay down drop cloths, and tape off baseboards with painter’s tape to keep the sanding dust from invading adjoining hallways.
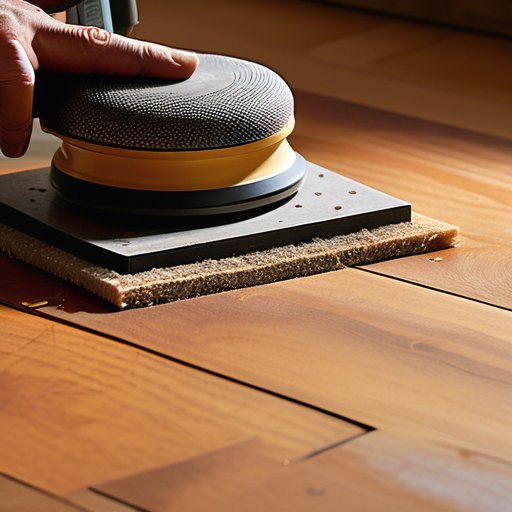
- 3. Sand with a purpose, not just a machine. I prefer a dual‑stage approach: start with a 60‑grit disc to strip away old finish, then graduate to 100‑grit for a smoother surface. As the dust swirls, I imagine the floor’s grains whispering stories of distant markets I once visited. Keep the sander moving in the direction of the wood grain, and pause frequently to vacuum away debris—this prevents overheating and preserves the wood’s natural texture.
- 4. Address any hidden imperfections. After the first pass, inspect the surface for nail holes, dents, or loose boards. I use a wood filler that matches the floor’s tone, pressing it gently with a putty knife and smoothing it with a damp cloth. Let it dry completely—usually overnight—so the filler integrates seamlessly, much like a traveler blending into a new culture.
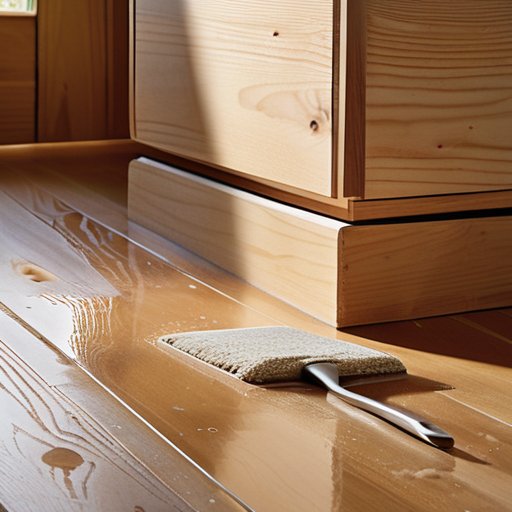
- 5. Apply a protective finish that tells a story. Choose between a water‑based polyurethane for a crisp, modern sheen or an oil‑based one for a warm, amber glow reminiscent of sunset‑lit terraces in Marrakesh. I apply the first coat with a high‑quality brush, watching the liquid glide like a river over stone. Allow at least 24 hours of curing before sanding lightly with 220‑grit sandpaper, then apply a second coat for durability.
- 6. Re‑introduce the room’s character with thoughtful placement. Once the finish is fully cured, carefully move the furniture back, placing felt pads under legs to protect the freshly restored surface. Finally, I step onto the floor, feeling the subtle resilience underfoot—a reminder that every creak now carries a narrative of renewal, just as my journeys across continents have reshaped my own perspective.
How to Refinish Hardwood Floors Repair Scratches and Stain Like a Pro
Before you think about the final sheen, prep sets the stage. When you ask yourself how to refinish hardwood floors like a seasoned pro, the answer lies in choosing the right grit and tool. The best sandpaper grit for hardwood sanding is 80‑grit for the initial pass; it lifts old finish without gouging, and a follow‑up with 120‑grit smooths the surface for the stain. If you don’t own a belt sander, consider a floor sanding equipment rental service; many local tool libraries offer day rates that include a random‑orbit and an edging sander, saving you a costly purchase.
The floor is sanded, so tackle marks. Repairing scratches on hardwood flooring is less intimidating than it sounds—clean the area, apply a coat of wood filler that matches grain, and sand lightly with 220‑grit before staining. For a layered look, try the DIY hardwood floor staining techniques many artisans swear by: rag‑wipe on a diluted stain, brief pause, then second coat for depth. Then seal work with applying polyurethane finish to wood floors in strokes; coats, lightly sanded between passes, will give you lasting gloss that endures foot traffic and time.
Choosing the Best Sandpaper Grit Renting Equipment for Global Results
I’ve found that picking the right grit is half the battle when you’re learning how to refinish hardwood floors in a cramped London flat or a chalet in the Alps. I begin with a 36‑40 grit disc to break up the old finish, then drop to 80 grit for a smoother base. The best sandpaper grit for hardwood sanding depends on the floor’s age—older boards tolerate a coarser start, newer ones need only a gentle 120‑grit pass. Once the surface feels matte, a vacuum and wipe‑down are a must; missed dust will ruin the next stage.
When I’m not chasing diplomatic briefings, I head to the local tool library for floor sanding equipment rental—a way to avoid hauling a drum sander across borders. After the wood is prepped, I move to applying polyurethane finish to wood floors; a water‑based formula gives a clear sheen that works in climate. A dab of wax filler can take care of repairing scratches on hardwood flooring before the final coat, and a layer of DIY hardwood floor staining techniques adds a subtle depth that turns a tired hallway into a richer space.
Five Proven Tips to Breathe New Life into Weathered Hardwood
- Always start with a hidden‑spot test—your floor’s reaction to stain or finish can surprise you.
- Sand with the grain, not against it, to avoid gouging the wood and preserve its natural character.
- Match the stain’s undertone to the wood species; oak takes darker hues while maple shines with lighter shades.
- Maintain a consistent indoor climate (around 65‑70°F and 40‑50% humidity) while the finish cures.
- Finish by placing felt pads under furniture legs to guard your revitalised surface from future scratches.
Essentials to Remember
Patience and proper grit selection are your best allies—start coarse, finish fine, and let the wood breathe.
Repair before you refinish; addressing scratches and dents early ensures a seamless, lasting finish.
Protect your work with a high‑quality sealer or oil, and remember that regular maintenance keeps the floor’s story alive.
Echoes Beneath the Grain
“Every scrape and knot in a weathered floor tells a story; restoring it isn’t just about polish, it’s about honoring the silent journeys that have walked those boards before us.”
Alexandra Thompson
Wrapping It All Up
Looking back at the journey from dusty boards to a gleaming surface, we’ve walked through the essential checkpoints that turn a tired floor into a showcase of craftsmanship. First, a clear assessment of wear lets you decide whether a full‑scale sanding or a spot repair is called for. Next, selecting the right sandpaper grit, moving from coarse to fine, ensures you preserve the grain while erasing years of fatigue. Repair surface scratches with wood filler, then test stain on a hidden strip to lock in the colour you love. Finally, a thin, protective finish—oil, polyurethane, or wax—locks in durability and brings out that warm, natural glow. Ventilate, wear safety gear, and honor the wood’s history with each step.
Beyond the mechanics, restoring a hardwood floor is a quiet act of stewardship—an invitation to listen to the stories the boards have whispered under generations of footsteps. When the final coat dries and the room brightens, you’re not just unveiling a surface; you’re laying down a lasting legacy that will echo through future gatherings, family celebrations, and moments of everyday life. Share before‑and‑after photos, trade tips with neighbours, or host a mini‑workshop for friends curious about the craft. In a world that often rushes past the grain of history, a revived floor reminds us that patience, care, and a little imagination can turn the ordinary into something timeless.
Frequently Asked Questions
How can I safely remove old finish without damaging the wood, especially if my floor has been sealed for decades?
First, pick a hidden corner and apply a gentle, soy‑based stripper, letting it sit about 15‑20 minutes until the old film softens. Wear a respirator and work in a well‑ventilated room, then use a plastic scraper to lift the coat without gouging the grain. Rinse with a damp (not wet) cloth, dry promptly, and finish with a fine‑grit (120) hand‑sanded pass to reveal the wood’s original glow before applying a new finish.
What are the most cost‑effective sandpaper grit progressions for a smooth, professional‑grade finish on a vintage floor?
From my recent trip to a restored colonial house in Penang, I learned that a simple three‑step grit ladder does the trick without breaking the bank. Start with 36‑40 grit to strip the old finish, then move to 80‑100 grit for the first smoothing pass, and finish with 150‑180 grit for that whisper‑smooth, showroom‑ready surface. If the floor still feels rough, a quick 220‑grit pass will seal the deal before you stain it today.
Are there eco‑friendly stains or sealers that still give a durable, salon‑ready look without compromising indoor air quality?
Absolutely—there are several low‑VOC, water‑based stains and natural‑oil sealers that deliver that showroom shine without turning your home into a chemistry lab. I’ve had great results with brands like EcoStain™ Water‑Based Walnut (under 15 g VOC) and PureFinish™ Oil‑Based Sealer, which uses plant‑derived linseed oil and a tiny amount of bio‑based resin. Pair them with a fine‑grade, water‑soluble sanding sealer, sand lightly between coats, and you’ll get a durable, salon‑ready finish while keeping indoor air quality pristine.


